We are asked
to create a simple landscape using the three devices of aerial perspective:
- Controlled loss of focus and fading outlines
- A loss of colour saturation
- Colour temperature
To use all
the devices of aerial perspective, you really need a landscape where you can
see a long way into the distance. As I
live in Essex (second flattest county!) there are not that many views where you
can really see into the distance.
However, I did find a view whilst walking my dog – from Lincewood in
Langdon Hills Country Park over the fields towards the Thames Estuary and
London.
The day I
did my sketches was very cold and very grey, and so there was very little
colour in the scene (basically grey, more grey with hints of dark brown) so I
was happy to do pencil sketches as the scene in front of me was basically
monochrome anyway.
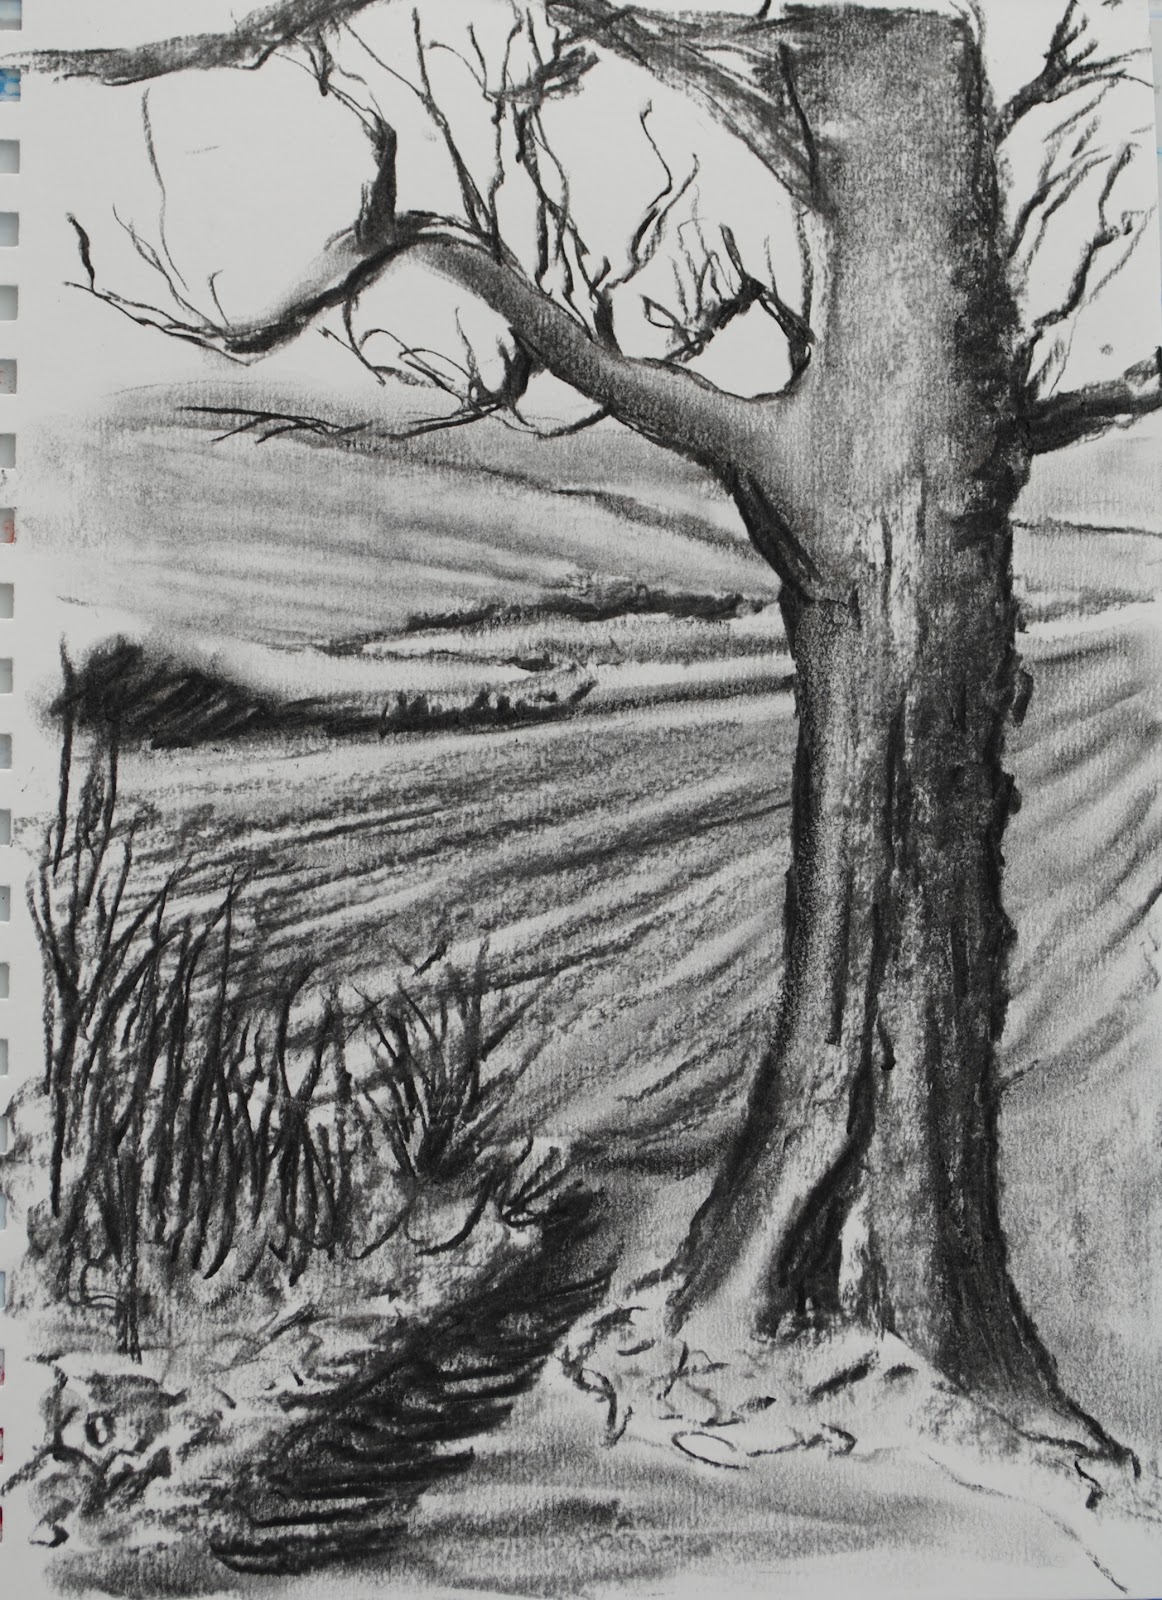
I found a
spot where the woods make way for open farmland, with a large oak tree and
smaller shrubs either side, marking the edge of the wood. I did two quick A5 sketches, one either side
of the tree. I felt the first sketch had
more options – the view was more open and there was a clear sense of
foreground, middle ground and distance.


I decided to
create a larger, A4 sketch in charcoal to check my composition and look at the
tonal balance. Colour wise, as stated
above, the view was monochromatic, so I had free rein to create my own colour
without being too influenced by the local colour. Reviewing this, I have the horizon line too high so need to bring this down the canvas further in order to achieve a sense of distance.
I prepared
my canvas by first covering with a layer of acrylic texture paste, applied with
loose brushstrokes to add texture, followed by a ground of transparent burnt
umber (I didn’t want any white to show through the paint so decided a neutral
earth tone would work well).
I worked
top-down, using a large, rough round brush to dab and scumble the paint onto
the canvas (mainly to avoid being too tight and fiddly). The sky was created using very pale beiges,
greys and blue.
I carried on
using the same technique as I worked down the canvas – beginning with very blue
tones and increasing the colour saturation and temperature as I moved towards
the foreground. Although the twigs and
tree were, in fact, a very dark brown, I added Light Red and Cadmium Red to my
Burnt Umber to further warm the colour (as well as using the Light Red for the
ploughed field and Cadmium Red in the twigs).
The
foreground was created using small brushstrokes and a mix of the 3 browns, a
dark grey and a little green. Painting
at this stage below (need to allow the paint to dry before finishing tree).

Finished painting:

Reviewing this, a couple of
things stood out:
- the colours in the sky seem more discernable after the tree was painted than before. I think it is because the branches break up the space and so you actually look at the different areas and pick up the colours, rather than seeing the area as a whole.
- The tree is more effective when painted over the sky (i.e. light colour) than the field because I was using transparent paint, the brushstrokes are more visible and glazing comes into play.
Also, using the light brown
ground added a hazy atmosphere to the sky where it shows through, and the same
goes for the ground showing through on the distant land. If I had left this white, it would be very
jarring and obvious but the brown blends into the fields.
In terms of effectiveness, I do
think you need all three devices of aerial perspective to get the greatest
sense of distance, although I would focus on colour temperature and controlled
loss of focus/contrast the most. While fading
out saturated colours is important, I have seen landscapes where there are
brighter and/or darker colours in the background and the loss of focus/scale is
used to give the sense of distance (e.g Van Gogh frequently used as bright colours
in the background as the foreground but would concentrate on colour temperature,
making the distance blue and/or purple).
No comments:
Post a Comment